Garden Room Construction UK: How They’re Built & What to Expect (2025)
Understanding garden room construction is essential when choosing a supplier and knowing what to expect during your project. The quality of construction directly affects performance, durability and long-term satisfaction with your garden room.
Garden Room Construction Methods
There are three main construction approaches used for garden rooms in the UK:
1. Modular/Panelised Construction
How it works:
- Panels manufactured in controlled factory environment
- Transported to site as complete sections
- Assembled on prepared base in 1-3 days
- Internal finishes completed on-site or in factory
Advantages:
- Consistent quality (factory conditions)
- Fast installation (weather-independent manufacturing)
- Minimal on-site disruption
- Precise engineering and fit
- Reduced waste
Disadvantages:
- Less flexibility for site changes
- Requires good site access for delivery
- Limited mid-project modifications
2. Stick-Built Construction
How it works:
- Traditional timber frame built entirely on-site
- Materials delivered and assembled piece by piece
- All construction happens in your garden
- Complete flexibility during build
Advantages:
- Maximum design flexibility
- Can adapt to site constraints
- Easier access to difficult sites
- Changes possible during construction
Disadvantages:
- Weather-dependent (delays common)
- Longer installation time (weeks not days)
- More site disruption
- Quality depends on individual tradespeople
- Higher waste levels
3. SIPs (Structural Insulated Panels)
How it works:
- Large sandwich panels (insulation core between structural boards)
- Factory-cut to exact specifications
- Rapid on-site assembly (2-5 days)
- Structural and insulation in one component
Advantages:
- Excellent insulation performance
- Very fast installation
- Strong and rigid structure
- Minimal thermal bridging
- Airtight construction
Disadvantages:
- Higher initial cost
- Requires crane for installation
- Difficult to modify after manufacture
- Specialist knowledge required
Garden Room Construction Materials

Structural Frame
Timber Frame (Most Common)
- Material: C16 or C24 graded timber
- Typical sizes: 45mm x 95mm to 70mm x 145mm
- Treatment: Pressure-treated or factory-applied preservative
- Lifespan: 50+ years with proper maintenance
Steel Frame (Premium Option)
- Material: Galvanised steel sections
- Standards: EN 1090 certified welding
- Benefits: Longer spans, thinner walls, termite-proof
- Lifespan: 75+ years
Insulation Materials
PIR (Polyisocyanurate) – Most Popular
- Brands: KINGSPAN, Celotex, Recticel
- Thickness: 50-150mm depending on location
- Performance: 0.022-0.023 W/mK thermal conductivity
- Benefits: Best performance per mm, moisture resistant
Mineral Wool – Traditional Choice
- Brands: ROCKWOOL, KNAUF, Superglass
- Thickness: 100-200mm for equivalent performance
- Performance: 0.034-0.044 W/mK thermal conductivity
- Benefits: Fire resistant, acoustic performance, breathable
Spray Foam – Specialist Application
- Types: Open-cell or closed-cell
- Application: Sprayed on-site into cavities
- Performance: 0.022-0.040 W/mK depending on type
- Benefits: Fills gaps completely, airtight
External Cladding
Timber Cladding
- Species: Western Red Cedar, Larch, Thermowood
- Profiles: Shiplap, featheredge, tongue & groove
- Treatment: Natural oils, stains or paints
- Maintenance: Re-treatment every 2-5 years
Composite Cladding
- Material: Wood-plastic composite or fibre cement
- Brands: Cedral, Trespa, Marley Eternit
- Finish: Pre-coloured, low maintenance
- Lifespan: 25-50 years with minimal maintenance
Render Systems
- Types: Acrylic, silicone or mineral renders
- Application: Over insulation boards or masonry
- Finish: Smooth, textured or patterned
- Maintenance: Minimal, occasional cleaning
Roofing Materials
EPDM Rubber Membrane
- Thickness: 1.2-1.5mm
- Application: Single-ply, heat-welded seams
- Lifespan: 40-50 years
- Benefits: Durable, flexible, weatherproof
GRP Fibreglass
- Application: Liquid applied, seamless finish
- Lifespan: 30-40 years
- Benefits: Completely waterproof, can be walked on
Green/Sedum Roofs
- Build-up: Waterproof membrane + drainage + growing medium + plants
- Benefits: Insulation, biodiversity, aesthetics
- Maintenance: 2-4 visits per year
Tiles (Pitched Roofs)
- Types: Slate, clay or concrete tiles
- Application: Traditional pitched roof construction
- Benefits: Traditional appearance, long lifespan
Windows and Doors
| Material | Cost | Maintenance | U-values | Lifespan |
|---|---|---|---|---|
| uPVC | £££ (most affordable) | Very low | 1.2-1.6 (double), 0.8-1.0 (triple) | 20-30 years |
| Aluminium | ££££ (premium) | Low | 1.4-1.8 (double), 0.8-1.2 (triple) | 30-40 years |
| Timber | £££££ (most expensive) | Medium (re-painting/staining) | 1.0-1.4 (double), 0.7-0.9 (triple) | 40-60 years |
The Garden Room Construction Process: Step by Step
Stage 1: Site Survey and Preparation (Week 1)
What happens:
- Professional site survey conducted
- Ground levels checked
- Access routes assessed
- Services locations identified (cables, pipes, drains)
- Any trees or obstacles noted
Your involvement:
- Provide site access
- Confirm final positioning
- Discuss any site-specific concerns
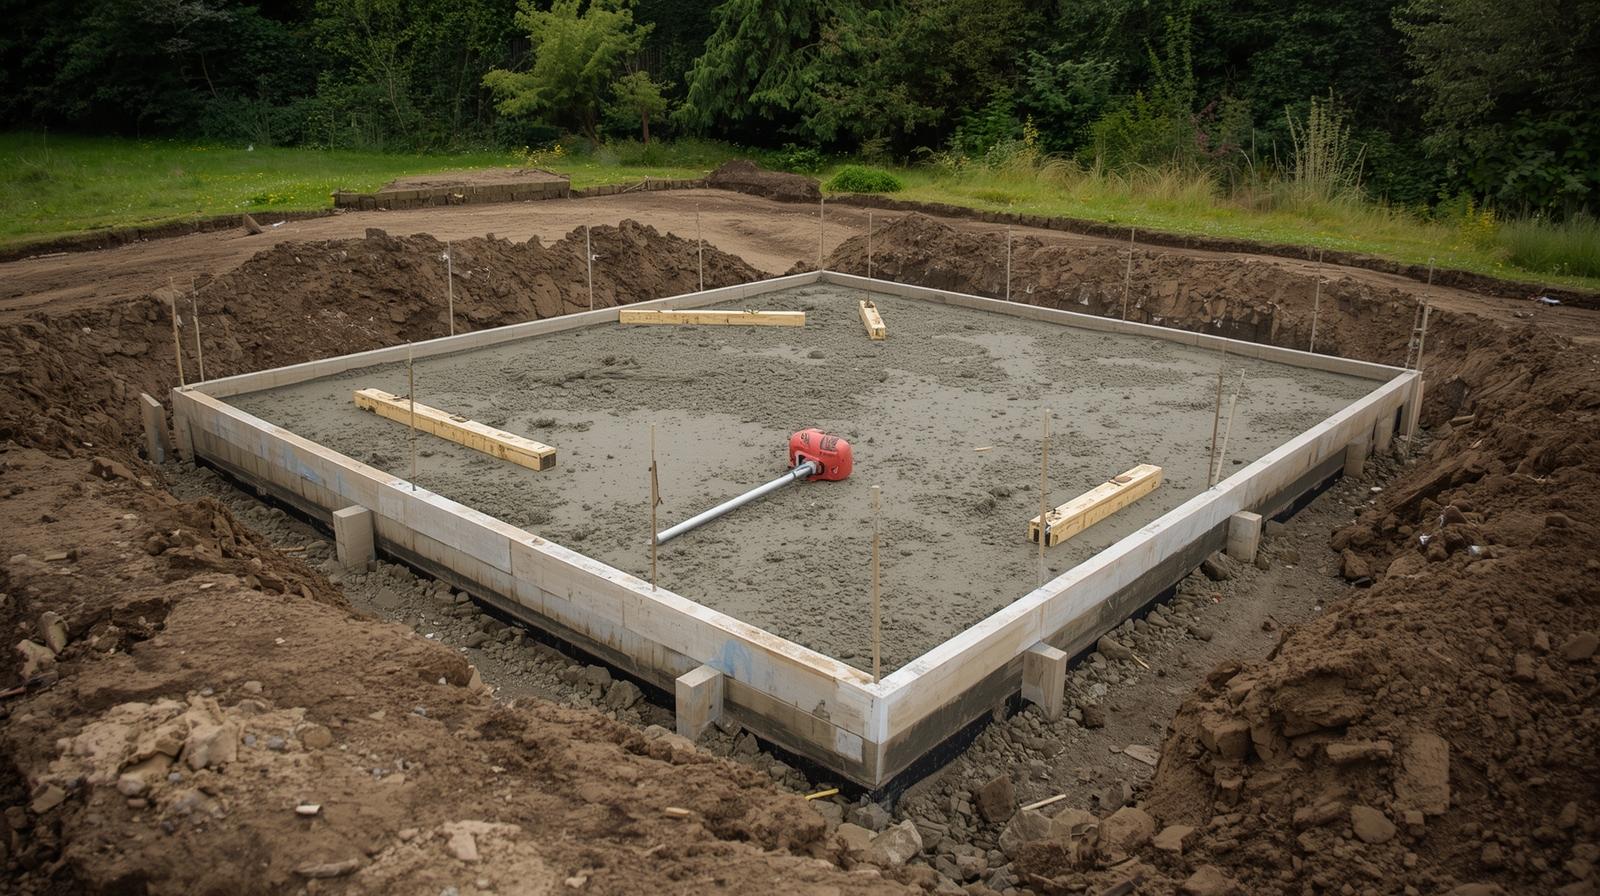
Stage 2: Groundwork and Foundations (Weeks 1-2)
What happens:
- Site cleared and levelled
- Foundation type installed:
- Concrete slab: Most common, 100-150mm thick
- Concrete piers: For sloped or poor ground
- Screw piles: Minimal excavation, fast installation
- Existing patio: If suitable and level
Quality indicators:
- Level within 5mm across entire base
- Proper damp-proof membrane
- Adequate drainage provision
- Compacted hardcore base
Stage 3: Base Frame and Floor (Week 2)
What happens:
- Treated timber base frame constructed
- Insulation installed between joists
- Vapour control layer fitted
- Structural flooring (OSB or plywood) laid
- Damp-proof course installed
Quality indicators:
- Square and level frame
- Continuous insulation (no gaps)
- Properly sealed vapour barrier
- Rigid, squeak-free floor
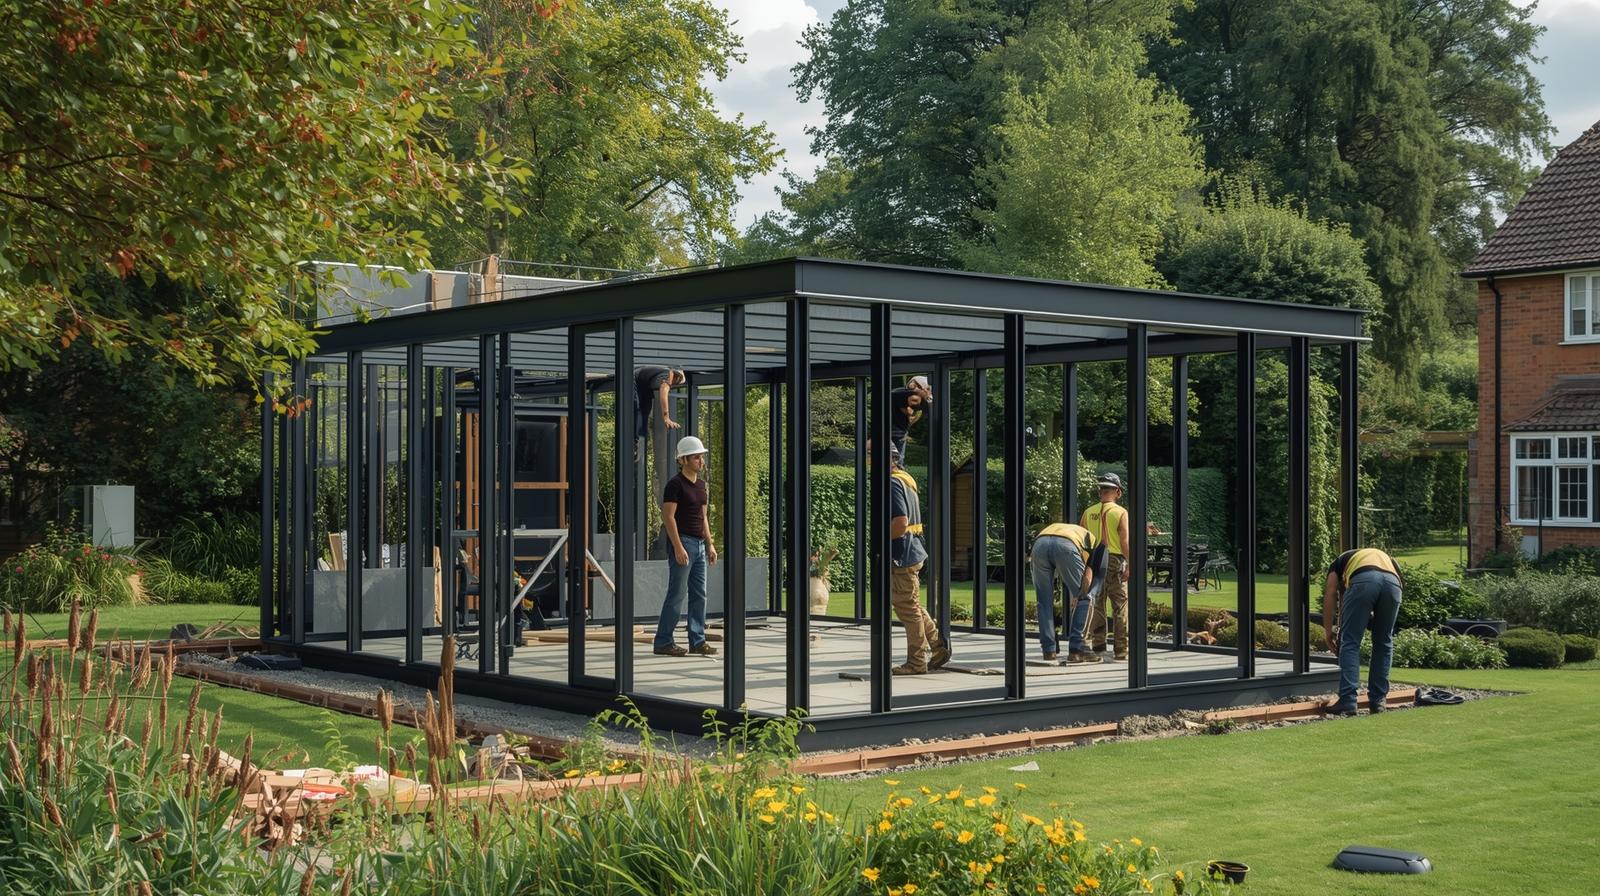
Stage 4: Wall Frame Construction (Week 2-3)
Modular construction:
- Pre-manufactured wall panels delivered
- Crane or manual lifting into position
- Panels secured to base frame
- Corner joints sealed and secured
Stick-built construction:
- Vertical studs erected
- Horizontal noggins fitted
- Window and door openings framed
- Bracing installed for rigidity
Quality indicators:
- Plumb and square walls
- Secure fixings at regular centres
- Proper framing around openings
- Structural integrity checked
Stage 5: Roof Structure (Week 3)
What happens:
- Roof joists or trusses installed
- Insulation fitted between/over joists
- Vapour control layer installed
- Roof deck (OSB or plywood) fitted
- Edge trims and fascias attached
Quality indicators:
- Correct falls for drainage (1:40 minimum)
- Continuous insulation layer
- Proper ventilation if required
- Secure fixings throughout
Stage 6: Weatherproofing (Week 3)
What happens:
- Roof membrane installed (EPDM, GRP or felt)
- Seams sealed and edges secured
- Flashings fitted around penetrations
- Guttering and downpipes installed
- Breathable membrane on walls
Quality indicators:
- Watertight seals at all joints
- Proper overlaps and edge details
- Secure fixing of membranes
- Tested for leaks if possible
Stage 7: External Cladding (Week 3-4)
What happens:
- Battens fitted to create ventilation cavity
- Insulation boards added (if render system)
- Cladding boards or panels installed
- Corner trims and finishing details
- Treatment/painting if required
Quality indicators:
- Even spacing and alignment
- Proper ventilation gaps maintained
- Secure fixing resistant to wind
- Professional finish at corners and edges
Stage 8: Windows and Doors (Week 4)
What happens:
- Window and door frames installed
- Sealed and made weatherproof
- Glazing units fitted
- Hardware and locks installed
- Tested for operation and security
Quality indicators:
- Square and plumb installation
- Smooth operation (no sticking)
- Weathertight seals
- Secure locking mechanisms
Stage 9: Electrical Installation (Week 4-5)
What happens:
- Cable runs from house to garden room
- Consumer unit/fuse board installed
- Socket and switch wiring
- Lighting circuits installed
- Testing and certification (Part P)
Must be done by qualified electrician
Quality indicators:
- Building Regulations compliant
- Proper RCD protection
- Adequate socket provision
- Professional certification provided
Stage 10: Insulation and Vapour Barriers (Week 5)
What happens:
- Wall cavity insulation installed
- Vapour control layer fitted to warm side
- All gaps and penetrations sealed
- Airtightness measures completed
Quality indicators:
- No gaps or compression of insulation
- Continuous vapour barrier
- Sealed around all services
- Thermal bridging minimised
Stage 11: Internal Finishes (Week 5-6)
What happens:
- Plasterboard or tongue & groove lining
- Plastering or taping/filling joints
- Skirting boards fitted
- Internal doors hung (if multi-room)
- Decoration preparation
Quality indicators:
- Smooth, even surfaces
- Neat joints and corners
- Secure fixing of boards
- Ready for decoration
Stage 12: Decoration and Final Finishes (Week 6)
What happens:
- Walls painted or finished
- Flooring installed (carpet, vinyl, laminate)
- Light fittings and switches fitted
- Final cleaning and snagging
- Handover and demonstration
Quality indicators:
- Professional decoration finish
- Clean, ready-to-use space
- All systems working
- Snagging list addressed
Total Construction Timeline
- Modular/Panelised: 4-8 weeks (order to handover)
- Stick-Built: 8-12 weeks (order to handover)
- SIPs: 4-6 weeks (order to handover)
Factors affecting timeline:
- Weather conditions
- Ground conditions
- Complexity of design
- Access constraints
- Availability of materials
- Coordination of trades
Quality Standards to Expect
Structural Standards
- Timber grading: C16 minimum, C24 preferred
- Treatment: Pressure-treated or equivalent
- Fixings: Appropriate for loads and materials
- Engineering: Designed for UK wind and snow loads
Thermal Performance
| Element | Target U-value (W/m²K) |
|---|---|
| Walls | 0.18-0.25 |
| Roof | 0.11-0.15 |
| Floor | 0.13-0.18 |
| Windows | 0.8-1.4 |
Weatherproofing
- Roof: 20+ year guaranteed membrane
- Walls: Breathable but weather-resistant
- Joints: Properly sealed and flashed
- Drainage: Adequate guttering and runoff
Electrical
- Certification: Part P compliant
- Protection: RCD on all circuits
- Capacity: Adequate for intended use
- Future-proofed: Spare capacity for additions
What Can Go Wrong: Common Construction Issues
Poor Foundations
Problem: Uneven settling, cracked walls, door/window issues
Prevention: Proper site survey, adequate foundation depth, correct base type for ground conditions
Inadequate Insulation
Problem: Cold room, condensation, high heating costs
Prevention: Specify proper U-values, continuous insulation, sealed vapour barriers, no thermal bridging
Weatherproofing Failures
Problem: Leaks, water damage, rot
Prevention: Quality membranes, proper installation, adequate overlaps, sealed penetrations, regular maintenance
Poor Ventilation
Problem: Condensation, mould, damp smell
Prevention: Adequate trickle vents, balanced ventilation, proper vapour control, consistent heating
Thermal Bridging
Problem: Cold spots, condensation, heat loss
Prevention: Continuous insulation, insulated cavity closers, proper detailing at junctions
Electrical Non-Compliance
Problem: Safety hazards, insurance issues, Building Control problems
Prevention: Use qualified electricians only, ensure Part P certification, proper RCD protection
KC Modular Buildings Construction Standards
At KC Modular Buildings, we set the standard for garden room construction quality in the UK:
Our Construction Approach
- Factory-built precision: 90% completed in controlled factory conditions
- Steel frame construction: EN 1090 certified welding for superior strength
- KINGSPAN insulation: Premium PIR insulation throughout (U-values: walls 0.16-0.18, roof 0.11, floor 0.13)
- Triple glazing standard: Aluminium or uPVC windows with U-value 0.5-1.1
- 50+ year design life: Built to last generations, not just decades
- ISO certified quality: ISO 9001, 1090, 3834, 14001 certified manufacturing
What Sets Us Apart
- 15-year structural warranty: Comprehensive protection (industry standard: 10 years)
- Part P electrical certification: All electrical work fully certified
- Building Regulations handled: We manage all compliance requirements
- Professional project management: Dedicated manager from order to handover
- Fast installation: Typically 2-3 days on-site (8-12 weeks total project)
- Minimal disruption: Factory construction means quiet, efficient site work
Quality Assurance Process
- Detailed site survey and ground assessment
- Factory quality control at every manufacturing stage
- Pre-delivery inspection before transport
- Professional installation by trained teams
- Comprehensive handover inspection
- Snagging resolution within 48 hours
- 12-month follow-up inspection included
Ready to Experience Superior Construction Quality?
See the KC Modular Buildings difference for yourself. Visit our showroom, view our construction methods, and discover why our garden rooms are built to last 50+ years.
Call us: 07443 564 451
Email: [email protected]
Visit: www.kcmodularbuildings.co.uk